Getting started with Probot
How to install and enable GitHub bots?

Software Dev | Tech Writer | Django | React | Open Source
Open-source projects get more complex and hard to manage as they grow in terms of codebase and contributions, and thus, GitHub bots could help the project maintainers to cut down on the tedious tasks that can be automated with minimum code and efforts on installation.
The easiest marketplace solution available for GitHub bots is Probot. We already discussed some great GitHub bots for every open-source project in the last article. Now, it's time to move a step forward and learn how to install, enable and customize these GitHub bots with an easy example.

Getting started with Probot
Pre-requisites:
To get started with Probot, you will need:
- An open-source repository hosted on GitHub
- Admin rights to install Probot apps on the GitHub repository or organization.
Most of the Probot apps available on their marketplace are hosted, so you just need to install them and you're ready to go, without any deployment needed. Although, there could be some of them that would require you to deploy them over services such as Glitch, Heroku, or GitHub Actions.
How to install a hosted Probot App?
To learn how to install a hosted Probot app, we'll walk through an example where I add the Welcome bot to one of my GitHub repositories.
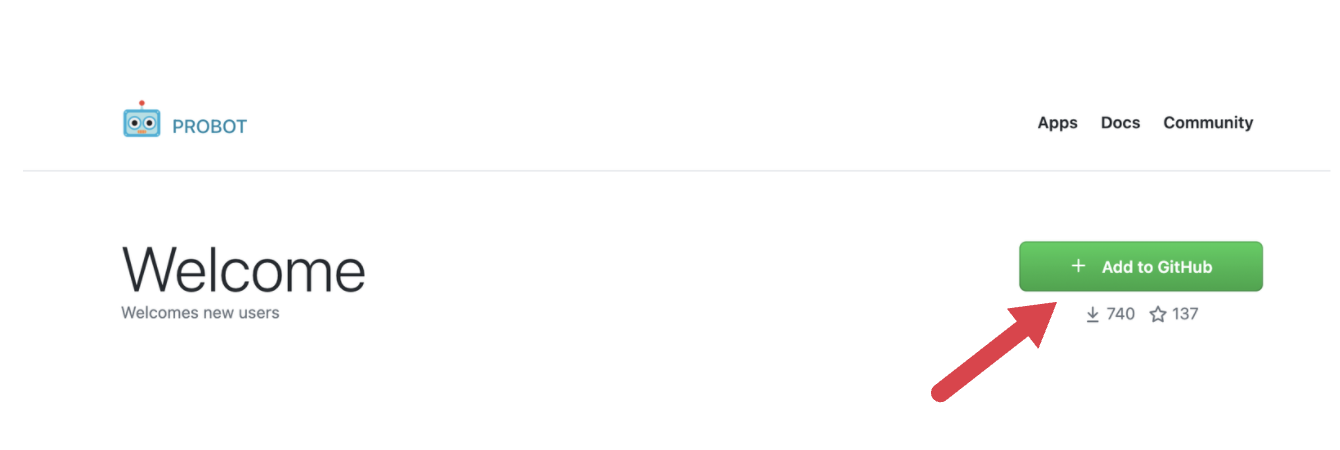
Step 1: Add to GitHub
Navigate to the Welcome bot webpage, and click on Add to GitHub button to begin as follows:
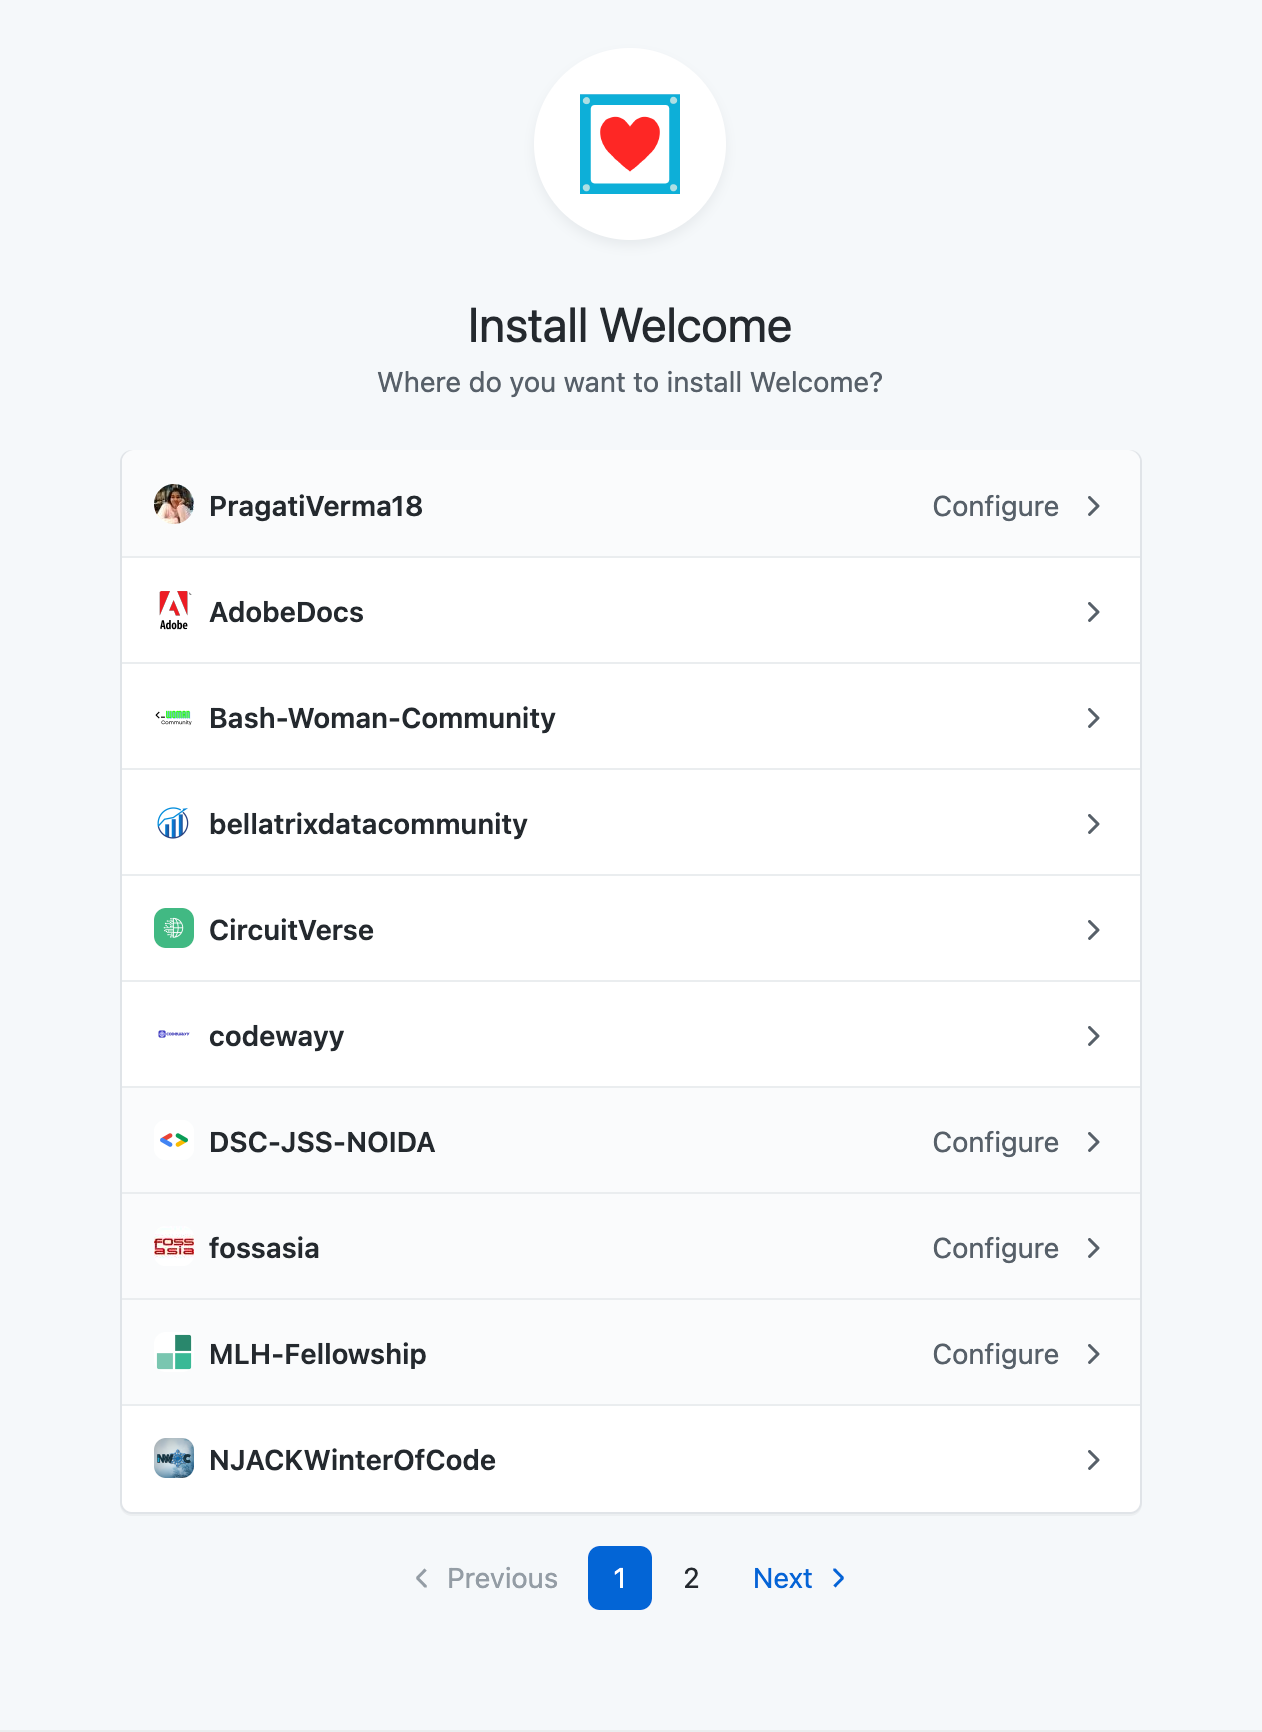
Step 2: Choose Account
Clicking on the Add to GitHub button will take you to a new tab, where you're asked to select the location or GitHub account where you want to install the Welcome bot. You'll notice that you can see a Configure option for the accounts or organizations where you have Admin access. Note that you won't be able to add the app to a repository where you don't have Admin access. For the next steps, I am choosing my personal account, so I'll select PragatiVerma18 here:
Step 3: Confirm Installation
You'll be asked to confirm installation by entering your GitHub password. Once you're done with that, you'll be taken to the settings page where you have most of the documentation and usage directions regarding the app. Scrolling down the same page, you'll find an option to opt for Repository access to the bot, as shown below:
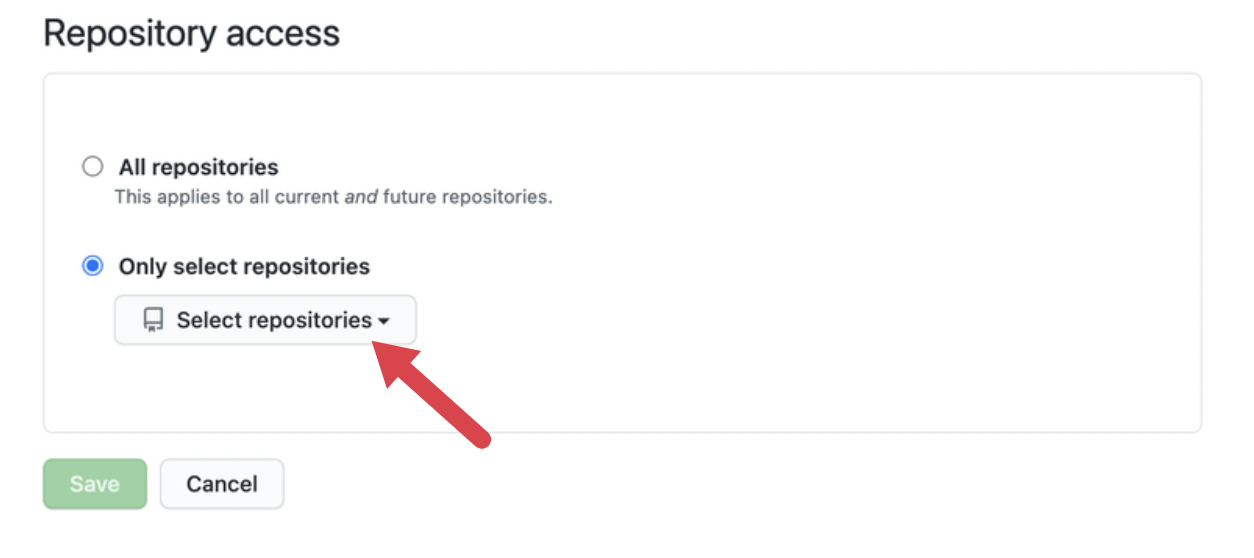
Choose the GitHub repository from the dropdown and click on save, to update the settings.
Step 4: Configuration
This is the last but the most important step, as we deal with the configurations for this app here. Navigate to the GitHub repository where you installed the Welcome bot. Create a .github/config.yml file to declare the contents of the comments, you can refer to the code as shown here:
# Configuration for new-issue-welcome - https://github.com/behaviorbot/new-issue-welcome

# Comment to be posted to on first-time issues
newIssueWelcomeComment: >
  Thanks for opening your first issue here! Be sure to follow the issue template!

# Configuration for new-pr-welcome - https://github.com/behaviorbot/new-pr-welcome

# Comment to be posted to on PRs from first-time contributors in your repository
newPRWelcomeComment: >
  Thanks for making your first PR here!

# Configuration for first-pr-merge - https://github.com/behaviorbot/first-pr-merge

# Comment to be posted to on pull requests merged by a first time user
firstPRMergeComment: >
  Congrats on merging your first pull request! We're are so proud of you!

# It is recommended to include as many gifs and emojis as possible
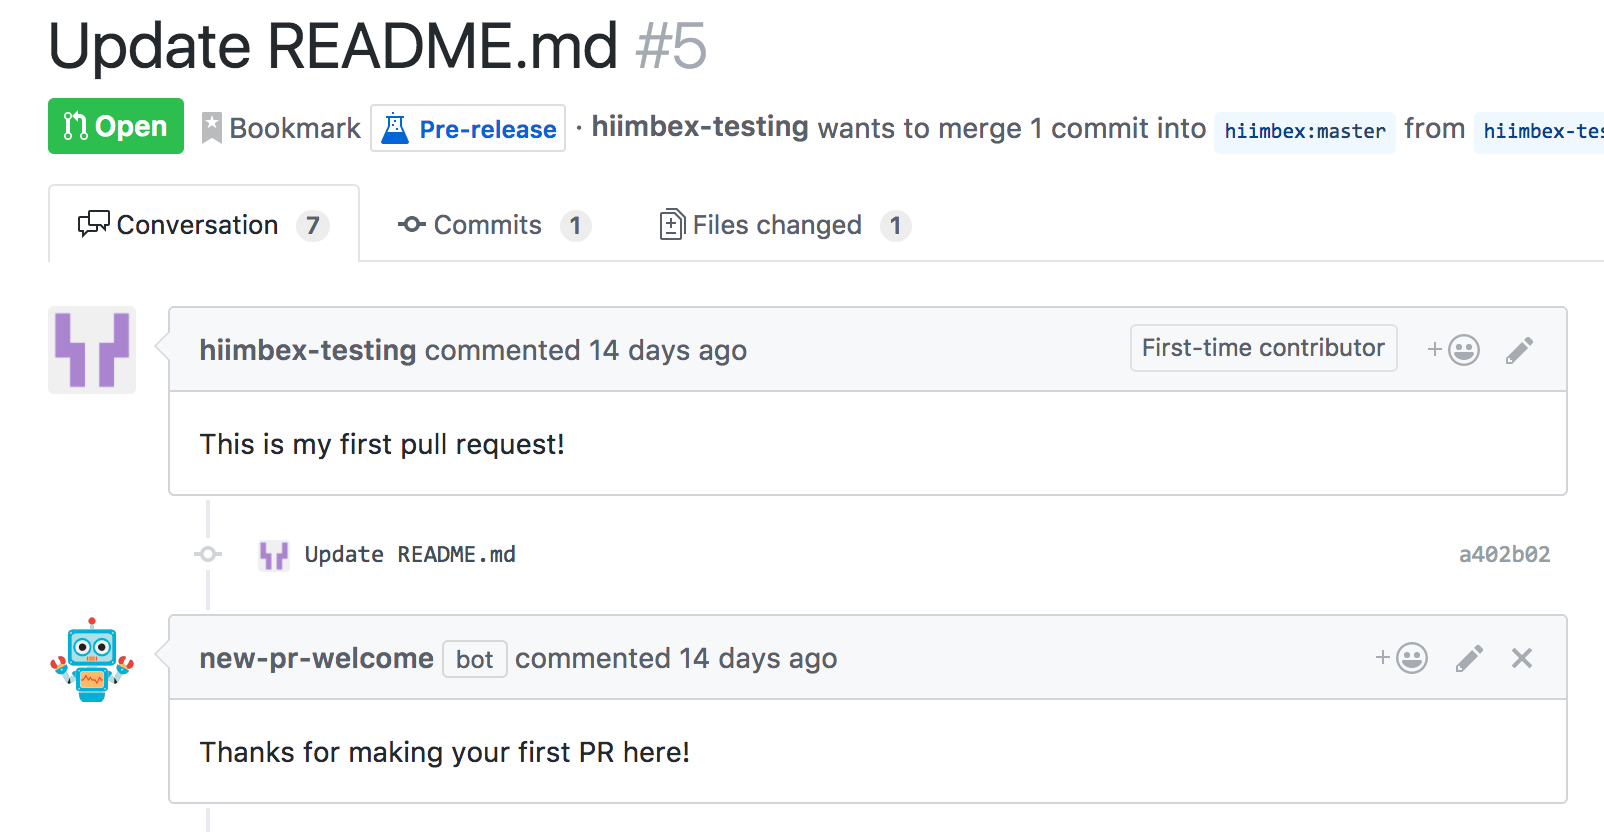
Yay!! You're all done. The installation and configuration for the Welcome bot are hereby complete and now you can see it working in the comments whenever someone opens up a new issue or Pull Request as seen here:
This was a simple example that can act as a reference, as most of the Probot apps usually follow similar steps to let you install and then customize their configurations inside a .yml file inside the .github folder on your default branch. The name of the file might vary as per the bot documentation.
To learn how to deploy unhosted Probot apps, read more here.
That's all for this article. I hope this has been a helpful and insightful read. Please comment with your valuable suggestions and feedback. Also, let me know your favorite GitHub bots or apps that you may have used.
In case you want to connect with me, follow the links below:


